.avif)
How to Set Up Klaviyo for Shopify: The Complete Integration Guide

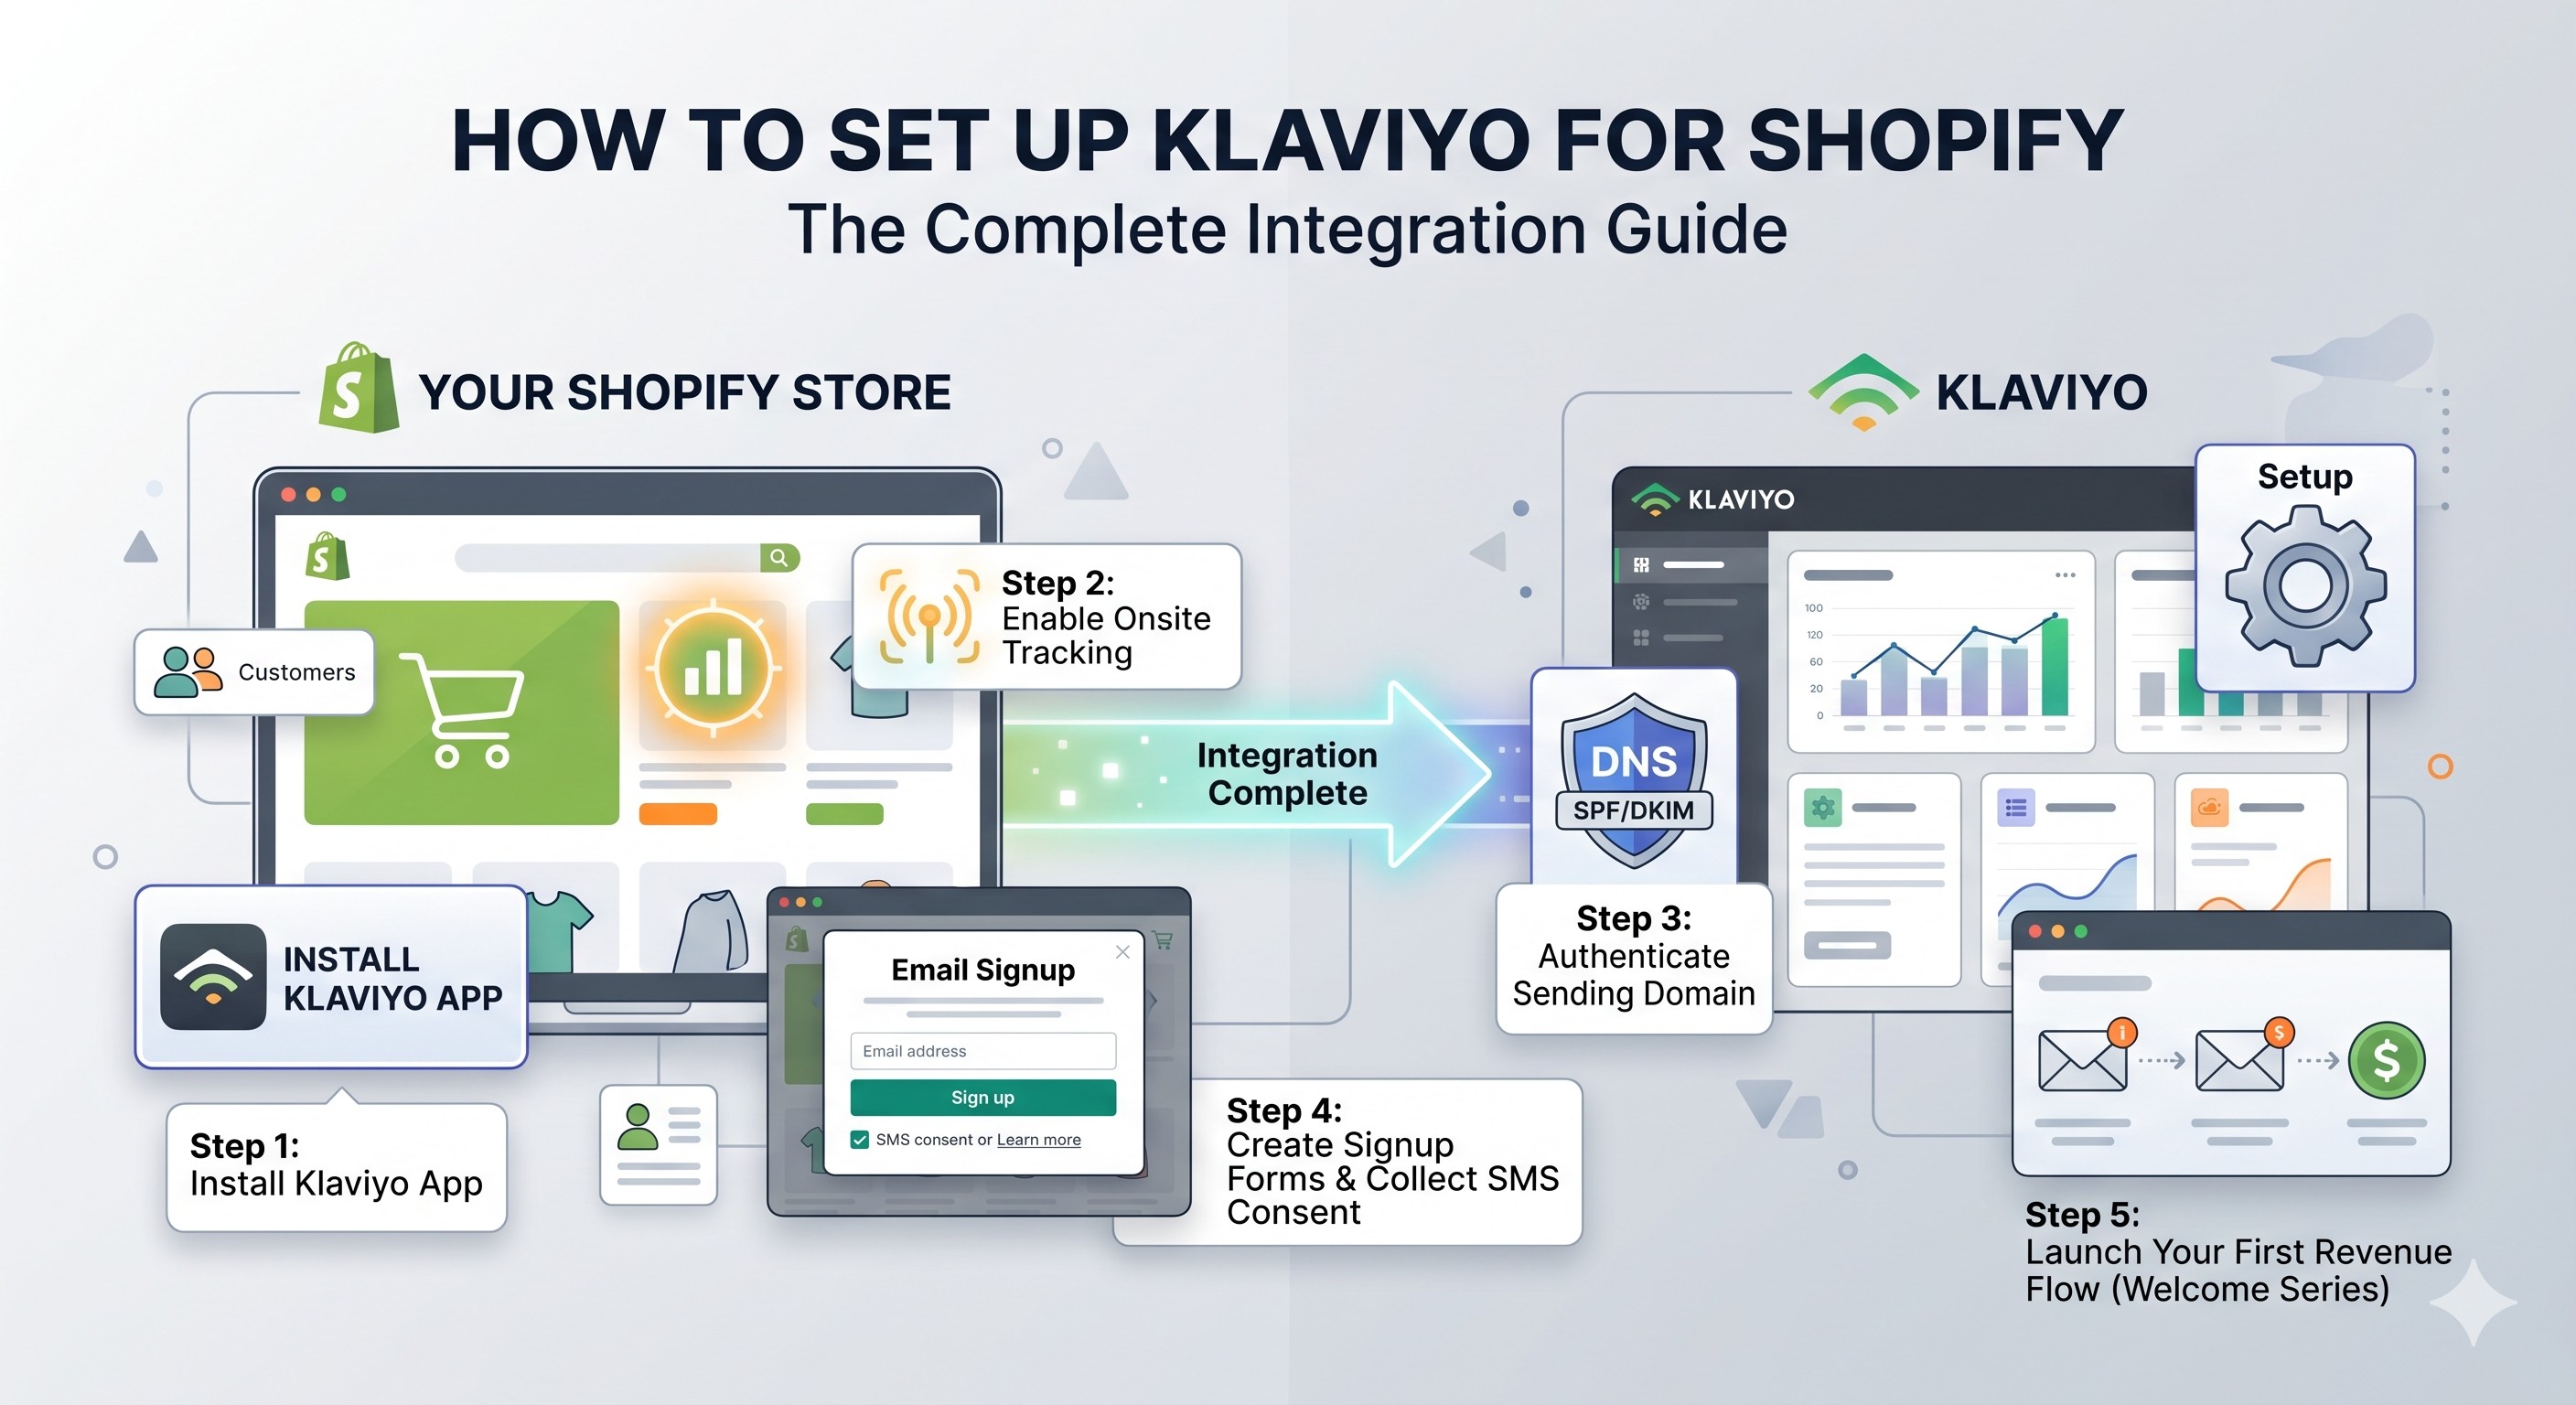
TL;DR: Connecting Klaviyo to Shopify takes about 45 minutes and unlocks the data you need to run real email and SMS marketing. This guide walks through the eight steps that matter most: installing the app, authorizing the connection, syncing customer data, turning on onsite tracking, authenticating your sending domain, building a signup form, importing existing subscribers, and launching your first flow. Follow it once and your store will be set up the way a $500k+ brand expects.
If you sell on Shopify and you're not running Klaviyo properly, you're leaving 25 to 35 percent of your revenue on the table. The integration is free and the connection takes less than an hour. The hard part is doing it the way that actually drives sales instead of just "connecting the apps and walking away."
This guide on how to set up Klaviyo for Shopify covers every step we walk new clients through at CartStrings, in the same order we run them. By the end, your store will track every product view and abandoned cart, your sending domain will be authenticated for inbox delivery, and your first revenue-generating flow will be live.
You don't need to be technical. You do need to follow the steps in order. Skip the DNS setup and your emails go to spam. Skip the form install and your popup never appears on the site. Most setup mistakes come from rushing through the parts that feel boring. Slow down, do them once, and you won't touch them again.
Why does every Shopify store need Klaviyo?
Klaviyo is the email and SMS platform Shopify brands use to turn customer data into revenue. It pulls every order, product view, and signup from Shopify in real time, then uses that data to send the right message at the right moment. Across Klaviyo's data set, properly configured stores generate 25 to 35 percent of total revenue from email.
The reason Klaviyo dominates Shopify is the depth of the native integration. Shopify Email gets you basic broadcast sends. Klaviyo gets you behavioral flows, predictive segmentation, and revenue attribution, all triggered by Shopify events without custom code.
The other number worth knowing: flows make up only 5.3 percent of sends but drive almost 41 percent of total email revenue, with revenue per recipient roughly 18 times higher than campaigns. That gap is why proper setup matters more than which template you pick.
How do you install Klaviyo on Shopify?
Install Klaviyo from the Shopify App Store by searching "Klaviyo: Email Marketing & SMS," click Add app, and authorize the connection. Klaviyo will sync the last 90 days of customers, orders, and product data automatically. The full historical sync runs in the background and finishes within minutes to a few days, depending on order volume.
Before you install, log in to your old email provider (if you have one) and disconnect it from Shopify. Klaviyo's docs specifically warn that keeping the old ESP active can trigger double opt-in emails to your existing subscribers, which is exactly how new installs lose 10 to 20 percent of their list overnight.
Sign up for Klaviyo at klaviyo.com using the same email tied to your Shopify admin. During onboarding, pick Shopify as your platform so Klaviyo prepopulates the integration. The free plan covers up to 250 active profiles and 500 monthly sends, which is plenty for stores starting fresh. Once you cross either limit, you'll be prompted to upgrade.
After authorizing, Klaviyo runs the initial sync. You can watch it complete by going to Integrations > Shopify in your Klaviyo dashboard. Don't start sending while the sync is running, because segments built mid-sync will miss customers and skew your data.
Setting up onsite tracking the right way
When you install the Klaviyo app, it adds the Klaviyo.js snippet to your Shopify theme through an app embed. This snippet powers the Active on Site, Viewed Product, Added to Cart, and Viewed Collection events. Without it, browse abandonment flows never trigger and your forms won't display.
To verify it's active, open your Shopify admin, go to Online Store > Themes > Customize, click App embeds, and confirm Klaviyo Onsite is toggled on. Klaviyo's help docs walk through this step, and if the toggle is off, your tracking is silently dead.
A recent change worth knowing: Klaviyo migrated the Added to Cart event to a Shopify Server Pixel, which captures conversions you'd otherwise lose to ad blockers and Safari's ITP. If you set up your store before this change, take five minutes to run the migration. Server-side tracking typically catches 15 to 20 percent more events than client-side alone.
How do I authenticate my sending domain in Klaviyo?
Go to Settings > Domains in Klaviyo, click Add a dedicated sending domain, and enter your store's domain. Use a subdomain like send.yourstore.com, not your root. Klaviyo will generate three DNS records: a CNAME for click tracking, a CNAME for DKIM, and a TXT record for domain verification. Add these to your DNS provider (Shopify, Cloudflare, GoDaddy, etc.) and click Verify in Klaviyo. Google and Yahoo now reject mail from senders without proper authentication, so this step is not optional.
Authentication is the single biggest deliverability factor for Shopify stores. Across the brands we manage at CartStrings, the first audit usually finds a misconfigured or missing DKIM record, which is why open rates sit at 18 percent instead of 40 percent.
If your domain is hosted at Shopify, you'll add the DNS records under Settings > Domains > Manage. Allow up to 48 hours for DNS to propagate, though most records verify within an hour. Once Klaviyo shows green checkmarks next to each record, your domain is authenticated and you're cleared for proper deliverability. We cover the full inbox-placement workflow in our guide on keeping Shopify emails out of spam.
Building your first signup form
A signup form is how visitors become subscribers. Klaviyo's form builder lives at Sign-up forms > Create new and supports popups, flyouts, and embedded forms. The fastest win is a single-step email-only popup offering 10 percent off, triggered at 40 to 60 percent scroll depth.
The data on form timing is clear. Immediate popups (0 to 3 seconds) convert at 1.5 to 2.2 percent, while popups timed to 40 to 60 percent scroll depth hit 2.5 to 3.5 percent. Asking for a phone number alongside email and requiring it reduces email conversions by 40 to 60 percent, so keep phone optional or use a two-step form. We've broken down the structures that work for Shopify in our popup and capture service.
Once your form publishes, target it to a Klaviyo list called "Newsletter" or "Email Subscribers." That list will be the trigger for your welcome flow. Skip the "Master List" naming Klaviyo uses by default; named lists scale better when you start running paid acquisition.
How do I set up SMS consent at Shopify checkout?
In Shopify admin, go to Settings > Checkout, scroll to Marketing options, and toggle on SMS. Then in Klaviyo, go to Integrations > Shopify, select the list you want SMS subscribers added to, and turn on double opt-in. Klaviyo strongly recommends a separate list for SMS and separate opt-in language so consent gets recorded correctly. Compliance laws require SMS to be optional, with clear disclosure language wherever you collect consent.
Treat SMS as a second channel, not an add-on to email. Mixing the two leads to consent issues that can get your sending number flagged. If you want SMS at checkout and at the popup, build a two-step form so the SMS opt-in has its own button.
One detail most stores miss: historical SMS subscribers don't sync automatically the way email subscribers do. If you're migrating, you'll need to manually import SMS opt-ins via CSV.
Launching your first revenue flow
By now your store is connected, tracked, authenticated, and capturing subscribers. The last step is turning Klaviyo from a database into a revenue engine: launching automated flows. Klaviyo recommends starting with the welcome series and abandoned cart because together they cover 35 to 45 percent of flow revenue.
Set up the welcome flow first. Trigger it on the signup form list you created earlier, send four to six emails over seven to ten days, and lead with the discount code from your popup. Then build the abandoned cart flow with three messages spaced one hour, twenty-four hours, and forty-eight hours after Started Checkout. From there, you can layer in browse abandonment, post-purchase, and winback. We map out the full priority order in our breakdown of the 7 essential Klaviyo flows for Shopify.
Don't skip the abandoned cart setup. It's the single highest-RPR flow in most accounts. If you want a step-by-step build, our Klaviyo abandoned cart flow guide walks through trigger filters, copy, and timing.
Final takeaways
A clean Klaviyo install is the difference between an email program that generates 8 percent of revenue and one that generates 30 percent. Three takeaways to lock in before you log off:
First, authenticate your sending domain on day one. Inbox placement compounds, and a delayed setup costs you months of damaged reputation. Second, verify the Klaviyo.js embed is active so browse abandonment and your popups actually work. Third, ship the welcome flow and abandoned cart sequence within your first week, even if the copy is rough. Revenue beats polish.
If your install is already live and the numbers aren't where you want them, the bottleneck is usually flow structure, not the platform. A free Klaviyo audit from CartStrings will tell you exactly where the leak is.
Frequently Asked Questions
How long does it take to set up Klaviyo for Shopify?
The connection itself takes about 15 minutes. A full production-ready setup with DNS authentication, signup form, and welcome flow takes 45 minutes to a few hours, depending on how fast your DNS provider propagates records. The historical data sync runs in the background and can take up to a few days for large stores.
Is Klaviyo free for Shopify stores?
Yes. Klaviyo's free plan covers up to 250 active profiles and 500 email sends per month, which is enough for a brand new store. Paid plans start once you cross either limit. SMS is metered separately by credit usage and isn't included in the email pricing tiers.
Do I need to disconnect my old email provider before installing Klaviyo?
Yes. Klaviyo's documentation explicitly states that keeping your old ESP connected to Shopify can trigger double opt-in confirmation emails to your existing list. Log in to your old platform, remove the Shopify integration, and only then install Klaviyo.
Why aren't my Klaviyo abandoned cart emails sending?
The two most common causes are an inactive Klaviyo.js embed or a missing trigger filter. Check that Klaviyo Onsite is toggled on inside your Shopify theme's app embeds, and confirm the flow trigger is set to Started Checkout or Added to Cart, with a "has not placed order since trigger" filter applied.
Can I use Klaviyo with Shopify Plus?
Yes. Klaviyo runs natively on Shopify Plus and supports advanced features like checkout extensibility, server pixel sync, and B2B segmentation. The setup process is identical to a standard Shopify install, though Plus stores benefit most from configuring server-side tracking for ad-blocker resilience.
Explore other Latest Blogs & Insights


Let’s build email marketing that feels like it was done in-house.